In today’s fast-paced world, learning how to store and extend the life of food is both practical and empowering. DIY food preservation isn’t just a throwback to old-fashioned homesteading—it’s a smart, sustainable solution for reducing waste, saving money, and enjoying homegrown or seasonal produce all year long.
Whether you're preserving garden harvests, prepping for emergencies, or simply trying to waste less, this guide covers the essentials of do-it-yourself food preservation, from freezing and drying to pickling and canning.
Why DIY Food Preservation Matters
Food preservation isn’t a new idea. For centuries, people have used various methods to keep food edible and safe for months. Today, DIY food preservation has regained popularity for many good reasons:
Reduces food waste
Saves money by buying in bulk or preserving seasonal produce
Encourages healthy, additive-free eating
Supports self-sufficiency and emergency preparedness
Best of all, anyone can learn the basics with a few simple tools and a bit of practice.
Top Methods for DIY Food Preservation
There’s no single “best” way to preserve food—it all depends on the type of food and how you plan to use it. Here are the most effective and accessible DIY food preservation techniques:
1. Freezing
Freezing is one of the easiest and most convenient preservation methods. Most fruits, vegetables, meats, and even full meals can be frozen with minimal prep.
Best for: Vegetables, fruits, soups, sauces, meats, baked goods
Tips:
Blanch vegetables before freezing to stop enzyme activity.
Use airtight containers or freezer bags to prevent freezer burn.
Label and date your items for easy rotation.
2. Dehydrating
Dehydrating removes moisture from food, preventing the growth of bacteria and mold. You can use a dehydrator, oven, or even sun-dry in warm climates.
Best for: Fruits, vegetables, herbs, jerky, grains
Tips:
Slice food evenly for consistent drying.
Store dried foods in airtight containers in a cool, dark place.
Rehydrate with water when ready to use in cooking or baking.
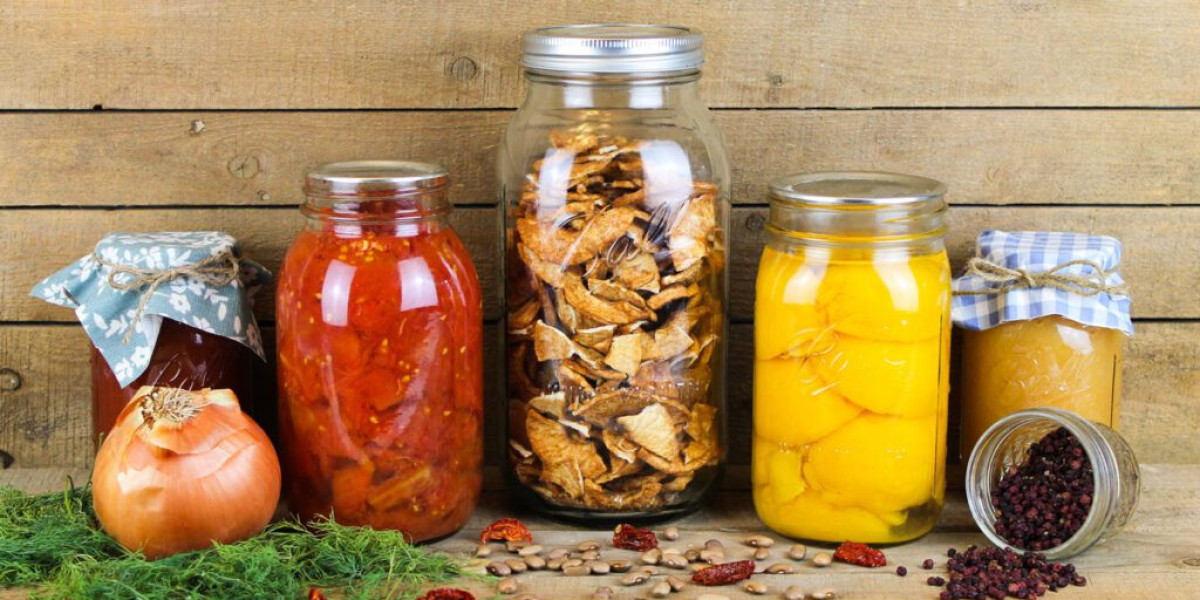
3. Canning
Canning involves sealing food in jars and processing them at high temperatures to kill bacteria and prevent spoilage. There are two types of canning:
Water bath canning: Best for acidic foods like fruits, jams, tomatoes, and pickles.
Pressure canning: Required for low-acid foods like vegetables, meats, and beans.
Best for: Jams, jellies, tomatoes, pickles, soups, beans
Tips:
Always follow tested canning recipes to ensure safety.
Sterilize jars and lids before use.
Check seals before storing—improper seals can lead to contamination.
4. Fermenting
Fermentation is a traditional method of preserving food using natural bacteria. It’s great for enhancing flavor and boosting gut health.
Best for: Sauerkraut, kimchi, yogurt, kefir, kombucha, pickled vegetables
Tips:
Keep food submerged in brine to prevent mold.
Use clean glass jars and ferment in a cool, dark area.
Taste frequently to determine when it's ready.
5. Pickling
Pickling uses vinegar or brine to preserve food and enhance flavor. It’s a quick and easy way to enjoy crunchy, tangy treats.
Best for: Cucumbers, carrots, onions, peppers, eggs
Tips:
Sterilize jars before filling.
Allow pickled items to sit for a few days for flavor development.
Store in the refrigerator or use water bath canning for shelf-stable storage.
6. Vacuum Sealing
Vacuum sealing removes air from packaging to extend the shelf life of frozen, dried, or refrigerated foods.
Best for: Meat, cheese, bulk grains, coffee, dried fruits
Tips:
Pair vacuum sealing with freezing or drying for longer storage.
Label packages clearly.
Avoid sealing moist foods without pre-freezing to prevent bacteria growth.
Tools to Get Started
You don’t need a full homestead to begin with DIY food preservation. A few simple tools can go a long way:
Freezer-safe containers or bags
Mason jars and lids
Pressure canner or water bath canner
Food dehydrator (or oven)
Vacuum sealer (optional but useful)
Large stockpot, funnel, ladle, and tongs
As your skills grow, you can expand your setup with more specialized equipment.
Food Safety First
While DIY food preservation is rewarding, it's important to follow food safety guidelines:
Always use clean, sanitized tools.
Follow trusted, tested recipes—especially for canning and fermenting.
Label everything with dates.
Store preserved foods in a cool, dark, dry place.
If something smells off, grows mold, or looks unusual—when in doubt, throw it out.
Seasonal Ideas for DIY Food Preservation
Make the most of what’s in season by preserving fresh ingredients throughout the year:
Spring: Asparagus, strawberries, herbs
Summer: Tomatoes, berries, cucumbers, peaches, corn
Fall: Apples, squash, pumpkins, carrots
Winter: Citrus fruits, cabbage, root vegetables
Preserving food at its peak not only locks in flavor but also nutritional value.
Final Thoughts
DIY food preservation is more than a trend—it's a timeless skill that brings food security, reduces waste, and connects us to the rhythms of nature. Whether you're freezing garden veggies, fermenting cabbage, or putting up jars of peach jam, you're embracing a tradition that nourishes your body and your budget.
So, roll up your sleeves, gather your produce, and start preserving the abundance around you. Your future self—and your pantry—will thank you.